When properly applied epoxy flooring in your home can be a beautiful and durable addition to any floor. However, DIYers should be aware that this project requires extensive prep work and proper environmental conditions in order to succeed.
Proper ventilation is needed and safety gear like gloves, a respirator and eye protection should be worn at all times.
Prep Work
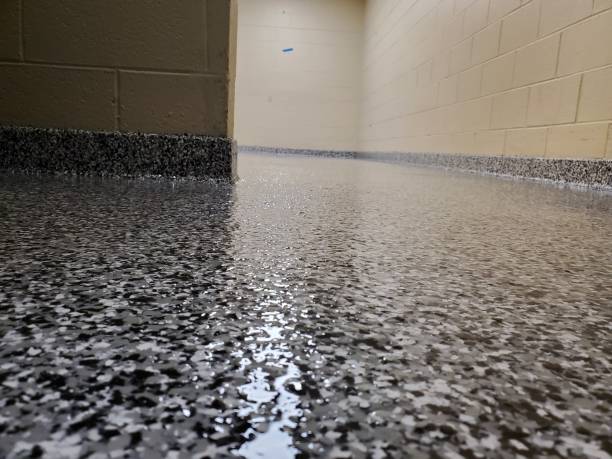
Epoxy flooring is a popular choice for many homeowners as it offers an attractive, long-lasting, and durable sealant. It is also easy to clean and maintain, adding a polished look to any room. In addition, epoxy floors are a great way to boost home value and increase resale, making them an investment worth the initial cost.
To install epoxy flooring, the first step is to prepare the surface. This is typically done by cleaning the floor and ensuring it is free of dirt, debris, and contaminants. It is also important to repair any cracks or chips in the concrete and sand or grind any rough or high spots on the surface. Finally, the floor needs to be tested for suitability by pouring a small amount of water on it. If the water beads up and does not soak in, then it is not a good surface for epoxy coating.
Once the floor is ready, it is time to mix the epoxy materials. The instructions for this vary depending on the specific type of epoxy you are using, so be sure to read the label carefully. Once the epoxy is mixed, it is time to start applying it. Use a nap roller to apply 2 coats of epoxy, allowing 12-24 hours in between each application. After the second coat is applied, it is a good idea to apply an anti-skid additive.
Mixing the Epoxy
When it comes to epoxy flooring, there are a number of crucial steps that must be taken care of properly in order to ensure the best results. This includes proper mixing of the epoxy materials. The statewide epoxy material provide detailed instructions for this process on the back of the container. This is generally a simple matter of combining equal parts of the resin and hardener and mixing thoroughly to achieve a smooth and even consistency.
It is important to keep in mind that the epoxy coating will need time to fully cure and harden after it is applied. This can take up to a week for the epoxy to reach full strength. While this can be an inconvenience, it is well worth the wait to ensure a durable and long-lasting finish that looks great!
It is also very important to make sure that the surface on which the epoxy is being applied is completely dry. If moisture accumulates on the floor, it can cause the epoxy to crack or peel. This can lead to expensive and difficult repairs down the road, so it is always best to check the moisture levels on your floor before beginning work. A simple way to test the moisture is by placing a garbage bag over the floor and taping it down on all four sides. After 24 hours, lift the garbage bag and inspect the floor for any signs of moisture.
Applying the Epoxy
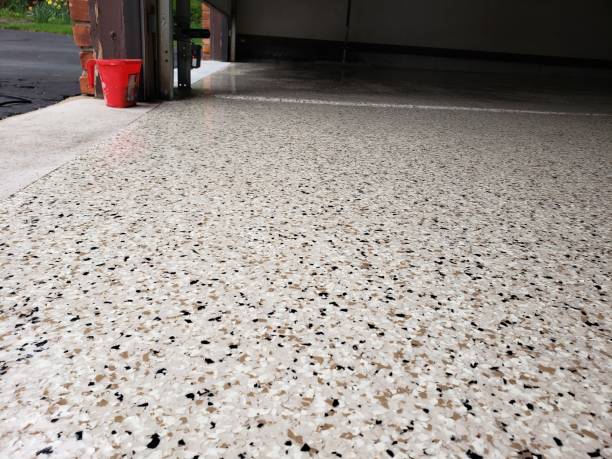
Once all the prep work is complete it’s time to apply the Statewide Epoxy. This is often the most labor-intensive part of the process. First, a roller is used to lay down a thin coat of base epoxy. This is the layer that will form the foundation of your new floor. Once the base coat is applied a serrated or notched squeegee can be used to smooth it out. Then it needs to be left to dry overnight.
If you’ve chosen a colored epoxy floor then it will likely be a good idea to also apply a clear top coat. This will not only add a protective finish to your floor, but it will also make the color pop. It’s important to remember that while it may be tempting to skip over this step, doing so can result in the need for more repairs down the road.
When it comes to applying the top coat it’s important to follow the manufacturer’s instructions exactly. It’s also important to mix only one bucket at a time due to the epoxy floor coating having a very short pot life. Once the top coat is applied it will need to dry for approximately four days before you can use your newly renovated floor. During this time it’s best to stay out of the area and keep pets and children away from the floor.
Applying the Top Coat
Once you’ve completed all of the prep work and applied several layers of epoxy, it’s time to apply the top coat. This is the clear coating that provides a protective layer for your epoxy flooring, and it also adds to its longevity.
When applying the top coat, it is important to keep in mind that it takes longer than the other layers to dry. It is recommended that you allow the floor to dry for at least 24 hours, but it may take up to 28 days for the epoxy floor to cure fully.
To help speed up the drying process, you should consider using a forced-air heater in the room. This will help circulate the air and increase the rate at which the epoxy dries.
It is also recommended that you use a high-quality roller brush to apply the top coat. This will ensure that the top coat is evenly distributed across the surface of your flooring.
Once the top coat has dried, you can start using your new floor. However, it is a good idea to place floor mats in entryways and high-traffic areas. This will prevent dust and debris from getting into the flooring and damaging it. You should also sweep and vacuum your flooring regularly to maintain its beauty and durability. A well-maintained DIY epoxy flooring will last for several years.
Be First to Comment